Tweaking Group Policy Editor
- Start > Run > type gpedit.msc (Not Available in Home Edition).
- Expand the Local Computer Policy branch.
- Expand the Administrative Templates branch.
- Expand the Network branch.
- Highlight the "QoS Packet Scheduler" in left window.
- In right window double click the "limit reservable bandwidth" setting.
- On setting tab check the ENABLED item.
- Change "Bandwidth limit %" to 0 (Zero).
- Close gpedit.msc.
Lvllords Patch
1)Download Lvllords Patch from the below link.
2) Extract the patch and run it.
3) Press "C" to change the limit and set it to 100.
4) Press "Y". After you do that, you'll be prompted with a Windows XP message saying that your original files are being replaced and stuff. Thats normal so DONT PANIC. Click "Ignore" or "Cancel" to that window, and press "Yes" after it asks for a confirmation.
5) You'll get a message that your patch was successfully executed. Exit and reboot your computer.
TCP Optimizer
1)Download TCP Optimizer from the below link.
2) Choose your connection speed - mine is 256 kbps. Go down and select "Optimal Settings". Click on Apply changes after that. You'll be promoted with a box.
3) Click OK, and click "Yes" to reboot your computer.
Tweaking Firefox
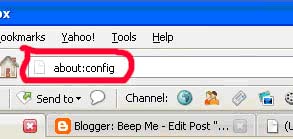
1) Type
about:config in the address bar and then press Enter.
And you will see a confirmation message like this:
Now click I’ll be careful, I promise!
2) You will see a label there
Filter, just next to it type
network.http.pipelining. Now be sure the value field is set true, if not double-click to set
true.
3) Go back to the Filter search bar and type
network.http.pipelining.maxrequests Double-click this option and set its value to
8.
4) In the Filter search bar and type
network.http.proxy.pipelining Once opened double-click on it and set it to
true.
5) Type
network.dns.disableIPv6 in the filter search bar and set this option to
true by double clicking on it.
6) CONTENT INTERRUPT PARSING
This preference controls if the application will interrupt parsing a page to respond to UI events. It does not exist by default.
Right-click (Apple users
ctrl+click) anywhere in the about:config window, select
New and then
Boolean from the pop-up menu. Then:
A. Enter
content.interrupt.parsing in the
New boolean value pop-up window and click
OK.
B. When prompted to choose the value for the new boolean, select
true and click
OK.
7) Rather than wait until a page has completely downloaded to display it to the user, Mozilla applications will regularly render what has been received to that point. This option controls the maximum amount of time the application will be unresponsive while rendering pages.
Right-click (Apple users ctrl+click) anywhere in the about:config window, select
New and then
Integer from the pop-up menu.
A. Enter
content.max.tokenizing.time in the New integer value pop-up window and click
OK.
B. You will be prompted to enter a value. Enter
2250000 and click
OK.
8) CONTENT NOTIFY INTERVAL
This option sets the minimum amount of time to wait between reflows. Right-click (Apple users ctrl+click) anywhere in the about:config window, select
New and then
Integer from the pop-up menu.
A. Type
content.notify.interval in the New integer value pop-up window and click
OK.
B. You will be prompted to enter a value. Enter
750000 and click
OK.
9) CONTENT NOTIFY ONTIMER
A. This option sets if to reflow pages at an interval any higher than that specified by content.notify.interval. Right-click (Apple users ctrl+click) anywhere in the about:config window and select
New and then
Boolean from the pop-up menu.
B. Type
content.notify.ontimer in the New
boolean value pop-up window and click
OK.
C. You will be prompted to choose the value for the new boolean. Select
true and click
OK.
10) Notify Backoffcount
This option controls the maximum number of times the content will do timer-based reflows. After this number has been reached, the page will only reflow once it is finished downloading. Right-click (Apple users ctrl+click) anywhere in the about:config window and select
New and then
Integer from the pop-up menu.
A. Enter
content.notify.backoffcount in the New integer value pop-up window and click
OK.
B. You will be prompted to enter a value. Enter
5 and click
OK.
11) CONTENT SWITCH THRESHOLD
You can interact with a loading page when content.interrupt.parsing is set to true. When a page is loading, the application has two modes: a high frequency interrupt mode and a low frequency interrupt mode. The first one interrupts the parser more frequently to allow for greater UI responsiveness during page load.
The low frequency interrupt mode interrupts the parser less frequently to allow for quicker page load. The application enters high frequency interrupt mode when you move the mouse or type on the keyboard and switch back to low frequency mode when you had no activity for a certain amount of time. This preference controls that amount of time. Right-click (Apple users ctrl+click) anywhere in the about:config window and select
New and then
Integer from the pop-up menu.
A. Enter
content.switch.threshold in the New
integer value pop-up window and click
OK.
B. You will be prompted to enter a value. Enter
750000 and click
OK.
12) NGLAYOUT INITIALPAINT DELAY
Mozilla applications render web pages incrementally, they display what??™s been received of a page before the entire page has been downloaded. Since the start of a web page normally doesn’t have much useful information to display, Mozilla applications will wait a short interval before first rendering a page. This preference controls that interval. Right-click (Apple users ctrl+click) anywhere in the about:config window and select
New and then
Integer from the pop-up menu.
A. Enter
nglayout.initialpaint.delay in the New
integer value pop-up window and click
OK.
B. You will be prompted to enter a value. Enter
0 and click
OK.
That’s it! Now restart Firefox and your browsing as well as downloading speed will be much more faster.